آموزش طرح بندی در گوگل AMP
آموزش طرح بندی در گوگل AMP
در این درس از مجموعه آموزش برنامه نویسی سایت سورس باران، به آموزش طرح بندی در گوگل AMP خواهیم پرداخت.
AMP-Layout یکی از ویژگی های مهم موجود در Google-amp است. Amp Layout اطمینان حاصل می کند که هنگام بارگیری صفحه ، بدون ایجاد سوسو زدن یا مشکل پیمایش، اجزای amp به درستی ارائه می شوند.
لیست ویژگی های طرح در زیر آورده شده است.
- width and height
- layout
- sizes
- heights
- media
- placeholder
- fallback
- noloading
ما ویژگی طرح را در این درس به طور دقیق بررسی خواهیم کرد. ویژگی های بقیه با جزئیات در فصل – Google AMP – ویژگی های این آموزش بیان شده است.
ویژگی طرح بندی
ما می توانیم از ویژگی layout در یک جز amp استفاده کنیم که تصمیم خواهد گرفت که چگونه مولفه در داخل صفحه نمایش داده شود. لیستی از طرح های پشتیبانی شده توسط amp در زیر آورده شده است –
- Not Present
- Container
- fill
- fixed
- fixed-height
- flex-item
- intrinsic
- nodisplay
- Responsive
برای هر یک از این چیدمان ها، یک مثال عملی مشاهده خواهیم کرد که نشان می دهد چگونه ویژگی layout به صورت متفاوتی مولفه amp را ارائه می دهد. ما در مثال های خود از مولفه amp-img استفاده خواهیم کرد.
مثال
|
1 2 3 4 5 6 7 8 9 10 11 12 13 14 15 16 17 18 19 20 21 22 23 24 25 26 27 28 29 30 31 32 33 34 35 36 37 38 39 40 41 42 43 44 45 46 47 48 49 50 51 52 53 |
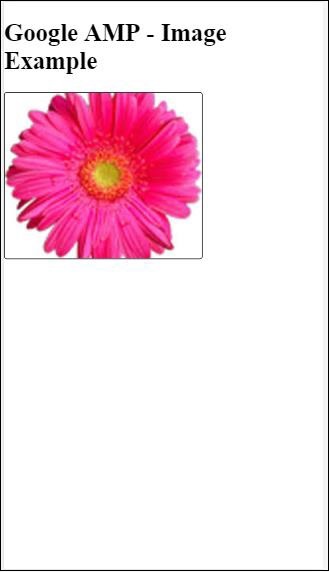
<!doctype html> <html amp lang = "en"> <head> <meta charset = "utf-8"> <script async src="https://cdn.ampproject.org/v0.js"></script> <title>Google AMP - Image</title> <link rel = "canonical" href = "http://example.ampproject.org/article-metadata.html"> <meta name = "viewport" content = "width = device-width, minimum-scale = 1,initial-scale = 1"> <style amp-boilerplate> body{ -webkit-animation: -amp-start 8s steps(1,end) 0s 1 normal both;-moz-animation: -amp-start 8s steps(1,end) 0s 1 normal both;-ms-animation: -amp-start 8s steps(1,end) 0s 1 normal both;animation: -amp-start 8s steps(1,end) 0s 1 normal both } @-webkit-keyframes -amp-start{from{visibility:hidden}to{visibility:visible}}@-moz-keyframes -amp-start{from{visibility:hidden}to{visibility:visible}}@-ms-keyframes -amp-start{from{visibility:hidden}to{visibility:visible}}@-o-keyframes -amp-start{from{visibility:hidden}to{visibility:visible}}@keyframes -amp-start{from{visibility:hidden}to{visibility:visible}} </style> <noscript> <style amp-boilerplate> body{ -webkit-animation:none; -moz-animation:none; -ms-animation:none; animation:none } </style> </noscript> <style amp-custom> amp-img { border: 1px solid black; border-radius: 4px; padding: 5px; } </style> </head> <body> <h1>Google AMP - Image Example</h1> <amp-img alt = "Beautiful Flower"src = "images/flower.jpg" width = "246" height = "205"> </amp-img> </body> </html> |
خروجی
مثال کانتینر
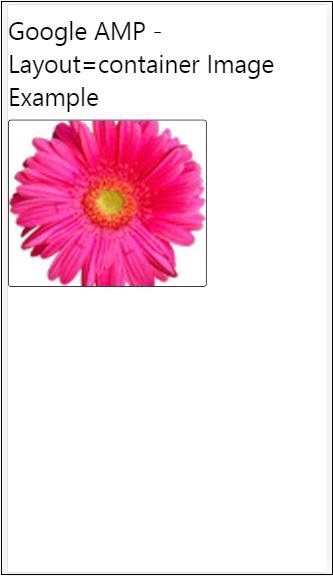
“Layout=”container بیشتر به عنصر والد داده می شود و عنصر فرزند اندازه های تعریف شده را می گیرد.
|
1 2 3 4 5 6 7 8 9 10 11 12 13 14 15 16 17 18 19 20 21 22 23 24 25 26 27 28 29 30 31 32 33 34 35 36 37 38 39 40 41 42 43 44 45 46 47 48 49 50 51 52 53 54 55 56 57 |
<!doctype html> <html amp lang = "en"> <head> <meta charset = "utf-8"> <script async src = "https://cdn.ampproject.org/v0.js"></script> <title>Google AMP - Image</title> <link rel = "canonical" href = "http://example.ampproject.org/article-metadata.html"> <meta name = "viewport" content = "width = device-width, minimum-scale = 1,initial-scale = 1"> <style amp-boilerplate> body{ -webkit-animation: -amp-start 8s steps(1,end) 0s 1 normal both;-moz-animation: -amp-start 8s steps(1,end) 0s 1 normal both;-ms-animation: -amp-start 8s steps(1,end) 0s 1 normal both;animation: -amp-start 8s steps(1,end) 0s 1 normal both }@-webkit-keyframes -amp-start{from{visibility:hidden}to{visibility:visible}}@-moz-keyframes -amp-start{from{visibility:hidden}to{visibility:visible}}@-ms-keyframes -amp-start{from{visibility:hidden}to{visibility:visible}}@-o-keyframes -amp-start{from{visibility:hidden}to{visibility:visible}}@keyframes -amp-start{from{visibility:hidden}to{visibility:visible}} </style> <noscript> <style amp-boilerplate> body{ -webkit-animation:none; -moz-animation:none; -ms-animation:none; animation:none } </style> </noscript> <style amp-custom> amp-img { border: 1px solid black; border-radius: 4px; padding: 5px; } h1{ font-family: "Segoe UI",Arial,sans-serif; font-weight: 400;margin: 10px 0; } </style> </head> <body> <h1>Google AMP - Layout = container Image Example</h1> <amp-accordion layout = "container"> <amp-img alt = "Beautiful Flower" src = "images/flower.jpg" width = "246" height = "205"> </amp-img> </amp-accordion> </body> </html> |
خروجی
مثال fill
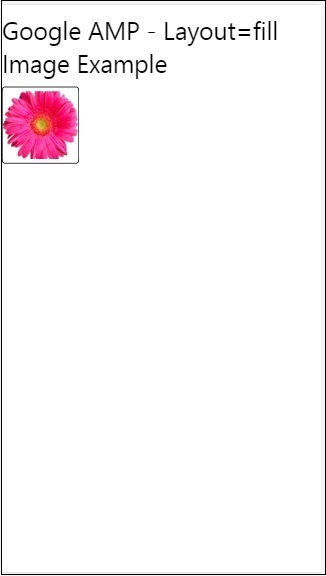
“Layout= ”fill عرض و ارتفاع عنصر اصلی را می گیرد.
|
1 2 3 4 5 6 7 8 9 10 11 12 13 14 15 16 17 18 19 20 21 22 23 24 25 26 27 28 29 30 31 32 33 34 35 36 37 38 39 40 41 42 43 44 45 46 47 48 49 50 51 52 53 54 55 56 57 58 59 |
<!doctype html> <html amp lang = "en"> <head> <meta charset = "utf-8"> <script async src = "https://cdn.ampproject.org/v0.js"></script> <title> Google AMP - Image <title> <link rel = "canonical" href = "http://example.ampproject.org/article-metadata.html"> <meta name = "viewport" content = "width = device-width, minimum-scale = 1,initial-scale = 1"> <style amp-boilerplate> body{ -webkit-animation: -amp-start 8s steps(1,end) 0s 1 normal both;-moz-animation: -amp-start 8s steps(1,end) 0s 1 normal both;-ms-animation: -amp-start 8s steps(1,end) 0s 1 normal both;animation: -amp-start 8s steps(1,end) 0s 1 normal both } @-webkit-keyframes -amp-start{from{visibility:hidden}to{visibility:visible}}@-moz-keyframes -amp-start{from{visibility:hidden}to{visibility:visible}}@-ms-keyframes -amp-start{from{visibility:hidden}to{visibility:visible}}@-o-keyframes -amp-start{from{visibility:hidden}to{visibility:visible}}@keyframes -amp-start{from{visibility:hidden}to{visibility:visible}} </style> <noscript> <style amp-boilerplate> body{ -webkit-animation:none; -moz-animation:none; -ms-animation:none; animation:none } </style> </noscript> <style amp-custom> amp-img { border: 1px solid black; border-radius: 4px; padding: 5px; } h1{font-family: "Segoe UI",Arial,sans-serif; font-weight: 400;margin: 10px 0;} </style> </head> <body> <h1>Google AMP - Layout = fill Image Example</h1> <div style = "position:relative;width:100px;height:100px;"> <amp-img alt = "Beautiful Flower" src = "images/flower.jpg" width = "246" height = "205" layout = "fill"> </amp-img> </div> </body> </html> |
خروجی
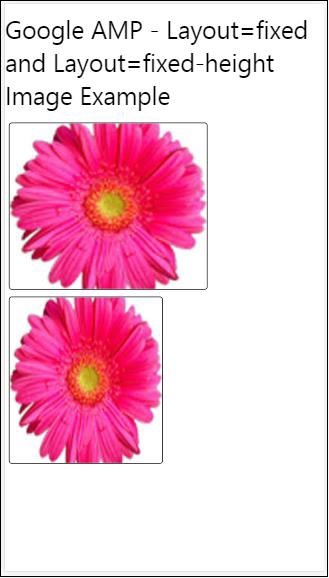
مثال Fixed و fixed-height
قبل از درک استفاده از Fixed و fixed-height، لطفاً به دو نکته زیر توجه کنید –
layout = “fixed” نیاز به عرض و ارتفاع دارد و جز amp amp در آن نشان داده می شود.
layout = “fixed-height” نیاز به مشخص بودن ارتفاع برای مولفه دارد. این اطمینان حاصل می کند که ارتفاع تغییر نکرده است. هنگام استفاده از ارتفاع ثابت نباید عرض تعیین شود یا ممکن است خودکار باشد.
|
1 2 3 4 5 6 7 8 9 10 11 12 13 14 15 16 17 18 19 20 21 22 23 24 25 26 27 28 29 30 31 32 33 34 35 36 37 38 39 40 41 42 43 44 45 46 47 48 49 50 51 52 53 54 55 56 57 58 59 60 61 62 63 64 65 66 67 68 69 70 71 72 |
<!doctype html> <html amp lang = "en"> <head> <meta charset = "utf-8"> <script async src = "https://cdn.ampproject.org/v0.js"></script> <title>Google AMP - Image</title> <link rel = "canonical" href = "http://example.ampproject.org/article-metadata.html"> <meta name = "viewport" content = "width = device-width, minimum-scale = 1,initial-scale = 1"> <style amp-boilerplate> body{ -webkit-animation: -amp-start 8s steps(1,end) 0s 1 normal both;-moz-animation: -amp-start 8s steps(1,end) 0s 1 normal both;-ms-animation: -amp-start 8s steps(1,end) 0s 1 normal both;animation: -amp-start 8s steps(1,end) 0s 1 normal both } @-webkit-keyframes -amp-start{from{visibility:hidden}to{visibility:visible}}@-moz-keyframes -amp-start{from{visibility:hidden}to{visibility:visible}}@-ms-keyframes -amp-start{from{visibility:hidden}to{visibility:visible}}@-o-keyframes -amp-start{from{visibility:hidden}to{visibility:visible}}@keyframes -amp-start{from{visibility:hidden}to{visibility:visible}} </style> <noscript> <style amp-boilerplate> body{ -webkit-animation:none; -moz-animation:none; -ms-animation:none; animation:none } </style> </noscript> <style amp-custom> amp-img { border: 1px solid black; border-radius: 4px; padding: 5px; } div{ display: inline-block; width: 200px; height:200px; margin: 5px; } h1{font-family: "Segoe UI",Arial,sans-serif; font-weight: 400;margin: 10px 0;} </style> </head> <body> <h1>Google AMP - Layout = fixed and Layout = fixed-height Image Example </h1> <div> <amp-img alt = "Beautiful Flower" src = "images/flower.jpg" width = "246" height = "205" layout = "fixed"> </amp-img> </div> <div> <amp-img alt = "Beautiful Flower" src = "images/flower.jpg" height = "205" layout = "fixed-height"> </amp-img> </div> </body> </html> |
خروجی
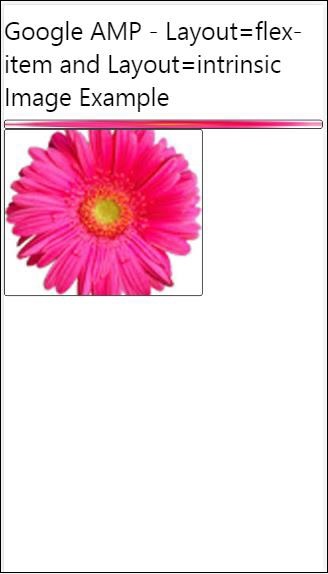
Flex-item و intrinsic
|
1 2 3 4 5 6 7 8 9 10 11 12 13 14 15 16 17 18 19 20 21 22 23 24 25 26 27 28 29 30 31 32 33 34 35 36 37 38 39 40 41 42 43 44 45 46 47 48 49 50 51 52 53 54 55 56 57 58 59 60 61 62 63 64 65 66 67 68 69 70 71 |
<!doctype html> <html amp lang = "en"> <head> <meta charset = "utf-8"> <script async src ="https://cdn.ampproject.org/v0.js"></script> <title>Google AMP - Image</title> <link rel = "canonical" href =" http://example.ampproject.org/article-metadata.html"> <meta name = "viewport" content = "width = device-width, minimum-scale = 1,initial-scale = 1"> <style amp-boilerplate> body{ -webkit-animation: -amp-start 8s steps(1,end) 0s 1 normal both;-moz-animation: -amp-start 8s steps(1,end) 0s 1 normal both;-ms-animation: -amp-start 8s steps(1,end) 0s 1 normal both;animation: -amp-start 8s steps(1,end) 0s 1 normal both } @-webkit-keyframes -amp-start{from{visibility:hidden}to{visibility:visible}}@-moz-keyframes -amp-start{from{visibility:hidden}to{visibility:visible}}@-ms-keyframes -amp-start{from{visibility:hidden}to{visibility:visible}}@-o-keyframes -amp-start{from{visibility:hidden}to{visibility:visible}}@keyframes -amp-start{from{visibility:hidden}to{visibility:visible <style> <noscript> <style amp-boilerplate> body{ -webkit-animation:none; -moz-animation:none; -ms-animation:none; animation:none } </style> </noscript> <style amp-custom> amp-img { border: 1px solid black; border-radius: 4px; padding: 5px; } displayitem { display: inline-block; width: 200px; height:200px; margin: 5px; } h1{font-family: "Segoe UI",Arial,sans-serif; font-weight: 400;margin: 10px 0;} </style> </head> <body> <h1>Google AMP - Layout = flex-item and Layout = intrinsic Image Example </h1> <div class = "displayitem"> <amp-img alt = "Beautiful Flower" src = "images/flower.jpg" layout = "flex-item"> </amp-img> </div> <div class = "displayitem"> <amp-img alt = "Beautiful Flower" src = "images/flower.jpg" width = "246" height = "205" layout = "intrinsic"> </amp-img> </div> </body> </html> |
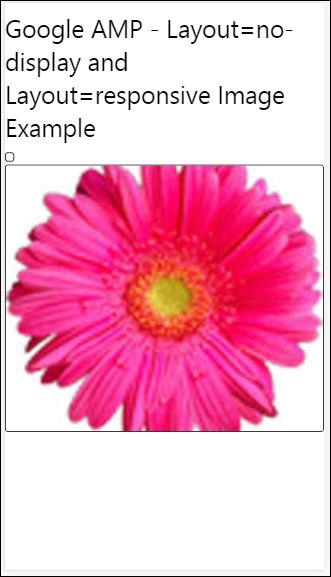
nodisplay و responsive
مولفه AMP با layout = nodisplay، مانند صفحه نمایش، هیچ فضای صفحه را اشغال نمی کند: هیچ. نیازی به افزودن ویژگی عرض و ارتفاع به چنین طرح هایی نیست.
مولفه آمپر با layout = responsive فضای موجود یا عرض صفحه را اشغال می کند و ارتفاع با نسبت نسبت عنصر تغییر اندازه می یابد.
|
1 2 3 4 5 6 7 8 9 10 11 12 13 14 15 16 17 18 19 20 21 22 23 24 25 26 27 28 29 30 31 32 33 34 35 36 37 38 39 40 41 42 43 44 45 46 47 48 49 50 51 52 53 54 55 56 57 58 59 60 61 62 63 64 65 66 67 68 69 70 71 |
<!doctype html> <html amp lang = "en"> <head> <meta charset = "utf-8"> <script async src = "https://cdn.ampproject.org/v0.js"> </script> <title>Google AMP - Image</title> <link rel = "canonical" href = "http://example.ampproject.org/article-metadata.html"> <meta name = "viewport" content="width=device-width, minimum-scale = 1,initial-scale = 1"> <style amp-boilerplate> body{ -webkit-animation: -amp-start 8s steps(1,end) 0s 1 normal both;-moz-animation: -amp-start 8s steps(1,end) 0s 1 normal both;-ms-animation: -amp-start 8s steps(1,end) 0s 1 normal both;animation: -amp-start 8s steps(1,end) 0s 1 normal both} @-webkit-keyframes -amp-start{from{visibility:hidden}to{visibility:visible}}@-moz-keyframes -amp-start{from{visibility:hidden}to{visibility:visible}}@-ms-keyframes -amp-start{from{visibility:hidden}to{visibility:visible}}@-o-keyframes -amp-start{from{visibility:hidden}to{visibility:visible}}@keyframes -amp-start{from{visibility:hidden}to{visibility:visible}} </style> <noscript> <style amp-boilerplate> body{ -webkit-animation:none; -moz-animation:none; -ms-animation:none; animation:none} </style> </noscript> <style amp-custom> amp-img { border: 1px solid black; border-radius: 4px; padding: 5px; } displayitem { display: inline-block; width: 200px; height:200px; margin: 5px; } h1{font-family: "Segoe UI",Arial,sans-serif; font-weight: 400;margin: 10px 0;} </style> </head> <body> <h1>Google AMP - Layout=no-display and Layout = responsive Image Example</h1> <div class = "displayitem"> <amp-img alt = "Beautiful Flower" src = "images/flower.jpg" layout = "no-display"> </amp-img> </div> <div class = "displayitem"> <amp-img alt = "Beautiful Flower" src = "images/flower.jpg" width = "246" height = "205" layout = "responsive"> </amp-img> </div> </body> </html> |
خروجی
لیست طرح های پشتیبانی شده در Google AMP به شرح زیر است
- Accordion
- Carousel
- Lightbox
- Slider
- Sideba
Amp-accordion
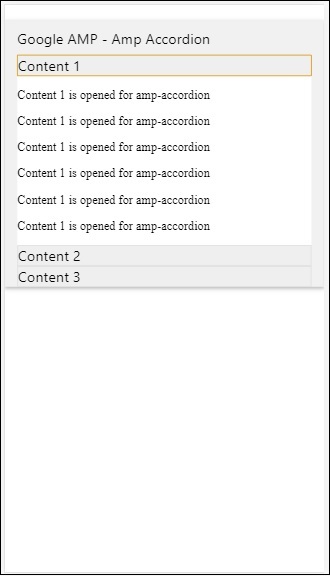
Amp-accordion یک جز amp آمپ است که برای نمایش مطالب در قالب گسترش-فروپاشی استفاده می شود. برای کاربران آسان است که بتوانند آن را در دستگاه های تلفن همراه مشاهده کنند ، جایی که می توانند طبق انتخاب آکاردئون ، بخشی را انتخاب کنند.
برای کار با آکاردئون، باید اسکریپت زیر را اضافه کنید –
|
1 2 3 |
<script async custom-element = "amp-harmonion" src = "https://cdn.ampproject.org/v0/amp-accordion-0.1.js"> </script> |
تگ Amp-accordion
|
1 2 3 4 5 6 7 8 9 10 11 12 13 14 |
<amp-accordion> <section class = "seca"> <h3>Content 1</h3> <div> <p>Content 1 is opened for amp-accordion</p> <p>Content 1 is opened for amp-accordion</p> <p>Content 1 is opened for amp-accordion</p> <p>Content 1 is opened for amp-accordion</p> <p>Content 1 is opened for amp-accordion</p> <p>Content 1 is opened for amp-accordion</p> </div> </section> … </amp-accordion> |
مثال
|
1 2 3 4 5 6 7 8 9 10 11 12 13 14 15 16 17 18 19 20 21 22 23 24 25 26 27 28 29 30 31 32 33 34 35 36 37 38 39 40 41 42 43 44 45 46 47 48 49 50 51 52 53 54 55 56 57 58 59 60 61 62 63 64 65 66 67 68 69 70 71 72 73 74 75 76 77 78 79 80 81 82 83 84 85 86 87 88 89 90 91 92 93 94 95 96 97 98 99 100 101 102 103 104 105 106 107 108 109 110 111 112 113 114 115 116 117 118 119 120 121 122 123 124 125 126 127 128 129 130 131 132 133 |
<!doctype html> <html amp lang = "en"> <head> <meta charset = "utf-8"> <script async src = "https://cdn.ampproject.org/v0.js"> </script> <title>Google AMP - Amp Accordion </title> <link rel = "canonical" href= "http://example.ampproject.org/article-metadata.html"> <meta name = "viewport" content = "width = device-width, minimum-scale = 1,initial-scale = 1"> <style amp-boilerplate> body{ -webkit-animation: -amp-start 8s steps(1,end) 0s 1 normal both;-moz-animation: -amp-start 8s steps(1,end) 0s 1 normal both;-ms-animation: -amp-start 8s steps(1,end) 0s 1 normal both;animation: -amp-start 8s steps(1,end) 0s 1 normal both } @-webkit-keyframes -amp-start{from{visibility:hidden}to{visibility:visible}}@-moz-keyframes -amp-start{from{visibility:hidden}to{visibility:visible}}@-ms-keyframes -amp-start{from{visibility:hidden}to{visibility:visible}}@-o-keyframes -amp-start{from{visibility:hidden}to{visibility:visible}}@keyframes -amp-start{from{visibility:hidden}to{visibility:visible}} </style> <noscript> <style amp-boilerplate> body{ -webkit-animation:none; -moz-animation:none; -ms-animation:none; animation:none} </style> </noscript> <script async custom-element = "amp-accordion" src = "https://cdn.ampproject.org/v0/amp-accordion-0.1.js"> </script> <style> input[type = text]{ width: 50%; padding: 12px; border: 1px solid #ccc; border-radius: 4px; resize: vertical; } label { padding: 12px 12px 12px 0; display: inline-block; font-family: "Segoe UI",Arial,sans-serif; font-weight: 400; } .col-label { float: left; width: 25%; margin-top: 6px; } .col-content { float: left; width: 75%; margin-top: 6px; } .row:after { content: ""; display: table; clear: both; } .amp_example { background-color: #f1f1f1; padding: 0.01em 16px; margin: 20px 0; box-shadow: 0 2px 4px 0 rgba(0,0,0,0.16),0 2px 10px 0 rgba(0,0,0,0.12)!important; } h3{ font-family: "Segoe UI",Arial,sans-serif; font-weight: 400;margin: 10px 0; } input[type=submit] { background-color: #ACAD5C; color: white; padding: 12px 20px; border: none; border-radius: 4px; cursor: pointer; float: right; } .lightbox {background-color: rgba(100, 100, 100, 0.5);} .seca {background-color:#fff;} </style> </head> <body> <div class = "amp_example"> <h3>Google AMP - Amp Accordion</h3> <amp-accordion> <section class = "seca"> <h3>Content 1</h3> <div> <p>Content 1 is opened for amp-accordion</p> <p>Content 1 is opened for amp-accordion</p> <p>Content 1 is opened for amp-accordion</p> <p>Content 1 is opened for amp-accordion</p> <p>Content 1 is opened for amp-accordion</p> <p>Content 1 is opened for amp-accordion</p> </div> </section> <section expanded class = "seca"> <h3>Content 2</h3> <div> <p>Content 2 is opened for amp-accordion</p> <p>Content 2 is opened for amp-accordion</p> <p>Content 2 is opened for amp-accordion</p> <p>Content 2 is opened for amp-accordion</p> <p>Content 2 is opened for amp-accordion</p> </div> </section> <section class="seca"> <h3>Content 3</h3> <div> <p>Content 3 is opened for amp-accordion</p> <p>Content 3 is opened for amp-accordion</p> <p>Content 3 is opened for amp-accordion</p> <p>Content 3 is opened for amp-accordion</p> <p>Content 3 is opened for amp-accordion</p> </div> </section> </amp-accordion> </div> </body> </html> |
خروجی
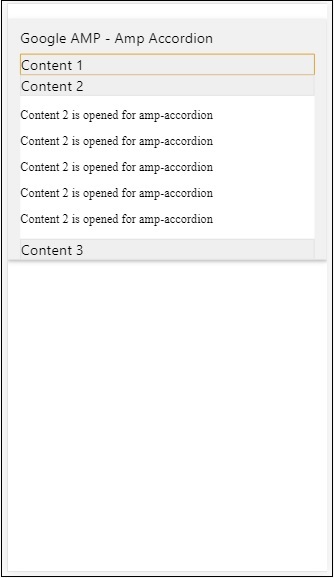
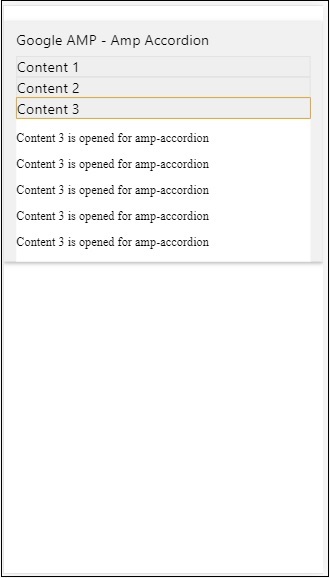
Amp-accordion دارای بخشهایی در داخل آن است. هر بخش می تواند 2 فرزند داشته باشد و بیش از 2 خطا در کنسول مرورگر نشان می دهد. شما می توانید یک کانتینر را به بخش اضافه کنید و می توانید چندین عنصر در آن داشته باشید.
به طور پیش فرض، ما یک بخش را با استفاده از ویژگی گسترش یافته به بخش ، در حالت گسترش یافته نگه داشته ایم.
آکاردئون های به هم ریخته
برای جمع شدن خودکار ، ما از ویژگی expand-single-section بر روی آکاردئون استفاده می کنیم همانطور که در مثال نشان داده شده است. بخشی که کاربر باز می کند فقط در حالت استراحت باقی مانده باقی می ماند و دیگران با استفاده از ویژگی expand-single-section می بندند.
|
1 2 3 4 5 6 7 8 9 10 11 12 13 14 15 16 17 18 19 20 21 22 23 24 25 26 27 28 29 30 31 32 33 34 35 36 37 38 39 40 41 42 43 44 45 46 47 48 49 50 51 52 53 54 55 56 57 58 59 60 61 62 63 64 65 66 67 68 69 70 71 72 73 74 75 76 77 78 79 80 81 82 83 84 85 86 87 88 89 90 91 92 93 94 95 96 97 98 99 100 101 102 103 104 105 106 107 108 109 110 111 112 113 114 115 116 117 118 119 120 121 122 123 124 125 126 127 128 129 130 131 132 133 134 |
<!doctype html> <html amp lang = "en"> <head> <meta charset = "utf-8"> <script async src = "https://cdn.ampproject.org/v0.js"> </script> <title>Google AMP - Amp Accordion </title> <link rel = "canonical" href= "http://example.ampproject.org/article-metadata.html"> <meta name = "viewport" content = "width = device-width, minimum-scale = 1,initial-scale = 1"> <style amp-boilerplate> body{ -webkit-animation: -amp-start 8s steps(1,end) 0s 1 normal both;-moz-animation: -amp-start 8s steps(1,end) 0s 1 normal both;-ms-animation: -amp-start 8s steps(1,end) 0s 1 normal both;animation: -amp-start 8s steps(1,end) 0s 1 normal both } @-webkit-keyframes -amp-start{from{visibility:hidden}to{visibility:visible}}@-moz-keyframes -amp-start{from{visibility:hidden}to{visibility:visible}}@-ms-keyframes -amp-start{from{visibility:hidden}to{visibility:visible}}@-o-keyframes -amp-start{from{visibility:hidden}to{visibility:visible}}@keyframes -amp-start{from{visibility:hidden}to{visibility:visible}} </style> <noscript> <style amp-boilerplate> body{ -webkit-animation:none; -moz-animation:none; -ms-animation:none; animation:none} </style> </noscript> <script async custom-element = "amp-accordion" src = "https://cdn.ampproject.org/v0/amp-accordion-0.1.js"> </script> <style> input[type = text]{ width: 50%; padding: 12px; border: 1px solid #ccc; border-radius: 4px; resize: vertical; } label { padding: 12px 12px 12px 0; display: inline-block; font-family: "Segoe UI",Arial,sans-serif; font-weight: 400; } .col-label { float: left; width: 25%; margin-top: 6px; } .col-content { float: left; width: 75%; margin-top: 6px; } .row:after { content: ""; display: table; clear: both; } .amp_example { background-color: #f1f1f1; padding: 0.01em 16px; margin: 20px 0; box-shadow: 0 2px 4px 0 rgba(0,0,0,0.16),0 2px 10px 0 rgba(0,0,0,0.12)!important; } h3{ font-family: "Segoe UI",Arial,sans-serif; font-weight: 400; margin: 10px 0; } input[type=submit] { background-color: #ACAD5C; color: white; padding: 12px 20px; border: none; border-radius: 4px; cursor: pointer; float: right;} .lightbox {background-color: rgba(100, 100, 100, 0.5);} .seca {background-color:#fff;} </style> <head> <body> <div class = "amp_example"> <h3>Google AMP - Amp Accordion</h3> <amp-accordion expand-single-section> <section class = "seca"> <h3>Content 1</h3> <div> <p>Content 1 is opened for amp-accordion</p> <p>Content 1 is opened for amp-accordion</p> <p>Content 1 is opened for amp-accordion</p> <p>Content 1 is opened for amp-accordion</p> <p>Content 1 is opened for amp-accordion</p> <p>Content 1 is opened for amp-accordion</p> </div> </section> <section class = "seca"> <h3>Content 2</h3> <div> <p>Content 2 is opened for amp-accordion</p> <p>Content 2 is opened for amp-accordion</p> <p>Content 2 is opened for amp-accordion</p> <p>Content 2 is opened for amp-accordion</p> <;p>Content 2 is opened for amp-accordion</p> </div> </section> <section class = "seca"> <h3>Content 3</h3> <div> <p>Content 3 is opened for amp-accordion</p> <p>Content 3 is opened for amp-accordion</p> <p>Content 3 is opened for amp-accordion</p> <p>Content 3 is opened for amp-accordion</p> <p>Content 3 is opened for amp-accordion</p> </div> </section> </amp-accordion> </div> </body> </html> |
خروجی
انیمیشن در آکاردئون
با استفاده از ویژگی animate ، می توانیم انیمیشن را برای انبساط-فروپاشی آکاردئون اضافه کنیم. نگاهی به مثال زیر بیاندازید –
|
1 2 3 4 5 6 7 8 9 10 11 12 13 14 15 16 17 18 19 20 21 22 23 24 25 26 27 28 29 30 31 32 33 34 35 36 37 38 39 40 41 42 43 44 45 46 47 48 49 50 51 52 53 54 55 56 57 58 59 60 61 62 63 64 65 66 67 68 69 70 71 72 73 74 75 76 77 78 79 80 81 82 83 84 85 86 87 88 89 90 91 92 93 94 95 96 97 98 99 100 101 102 103 104 105 106 107 108 109 110 111 112 113 114 115 116 117 118 119 120 121 122 123 124 125 126 127 128 129 130 |
<!doctype html> <html amp lang = "en"> <head> <meta charset = "utf-8"> <script async src = "https://cdn.ampproject.org/v0.js"> </script> <title>Google AMP - Amp Accordion </title> <link rel = "canonical" href = "http://example.ampproject.org/article-metadata.html> <meta name = "viewport" content = "width = device-width,minimum-scale = 1,initial-scale = 1"> <style amp-boilerplate> body{ -webkit-animation: -amp-start 8s steps(1,end) 0s 1 normal both;-moz-animation: -amp-start 8s steps(1,end) 0s 1 normal both;-ms-animation: -amp-start 8s steps(1,end) 0s 1 normal both;animation: -amp-start 8s steps(1,end) 0s 1 normal both } @-webkit-keyframes -amp-start{from{visibility:hidden}to{visibility:visible}}@-moz-keyframes -amp-start{from{visibility:hidden}to{visibility:visible}}@-ms-keyframes -amp-start{from{visibility:hidden}to{visibility:visible}}@-o-keyframes -amp-start{from{visibility:hidden}to{visibility:visible}}@keyframes -amp-start{from{visibility:hidden}to{visibility:visible}} </style> <noscript> <style amp-boilerplate> body{ -webkit-animation:none; -moz-animation:none; -ms-animation:none;animation:none } </style> </noscript> <script async custom-element = "amp-accordion" src = "https://cdn.ampproject.org/v0/amp-accordion-0.1.js"> </script> <style> input[type = text]{ width: 50%; padding: 12px; border: 1px solid #ccc; border-radius: 4px; resize: vertical; } label { padding: 12px 12px 12px 0; display: inline-block; font-family: "Segoe UI",Arial,sans-serif; font-weight: 400; } .col-label { float: left; width: 25%; margin-top: 6px; } .col-content { float: left; width: 75%; margin-top: 6px; } .row:after { content: ""; display: table; clear: both; } .amp_example { background-color: #f1f1f1; padding: 0.01em 16px; margin: 20px 0; box-shadow: 0 2px 4px 0 rgba(0,0,0,0.16), 0 2px 10px 0 rgba(0,0,0,0.12)!important; } h3{ font-family: "Segoe UI",Arial,sans-serif; font-weight: 400;margin: 10px 0; } input[type=submit] { background-color: #ACAD5C; color: white; padding: 12px 20px; border: none; border-radius: 4px; cursor: pointer; float: right; } .lightbox {background-color: rgba(100, 100, 100, 0.5);} .seca {background-color:#fff;} </style> </head> <body> <div class = "amp_example"> <h3>Google AMP - Amp Accordion</h3> <amp-accordion animate expand-single-section> <section class = "seca"> <h3>Content 1</h3> <div> <p>Content 1 is opened for amp-accordion</p> <p>Content 1 is opened for amp-accordion</p> <p>Content 1 is opened for amp-accordion</p> <p>Content 1 is opened for amp-accordion</p> <p>Content 1 is opened for amp-accordion</p> <p>Content 1 is opened for amp-accordion</p> </div> </section> <section class = "seca"> <h3>Content 2</h3> <div> <p>Content 2 is opened for amp-accordion</p> <p>Content 2 is opened for amp-accordion</p> <p>Content 2 is opened for amp-accordion</p> <p>Content 2 is opened for amp-accordion</p> <p>Content 2 is opened for amp-accordion</p> </div> </section> <section class="seca"> <h3>Content 3</h3> <div> <p>Content 3 is opened for amp-accordion</p> <p>Content 3 is opened for amp-accordion</p> <p>Content 3 is opened for amp-accordion</p> <p>Content 3 is opened for amp-accordion</p> <p>Content 3 is opened for amp-accordion</p> </div> </section> </amp-accordion> </div> </body> </html> |
خروجی
AMP Carousel
amp-carousel یک جز amp آمپ است که برای نشان دادن مجموعه ای از محتویات مشابه روی صفحه و استفاده از فلشها برای جابجایی بین محتوا ، استفاده می شود.
برای کار با amp-carousel ، باید اسکریپت زیر را اضافه کنیم –
|
1 |
<script async custom-element = "amp-carousel" src = "https://cdn.ampproject.org/v0/amp-carousel-0.1.js"> </script> |
تگ amp-carousel
تگ amp-carousel به شرح زیر است –
|
1 2 3 4 |
<amp-carousel height = "300" layout = "fixed-height" type = "carousel"> <amp-img src = "images / christmas1.jpg" width = "400" height = "300" alt = "a image image"> </amp-img> .... </amp-carousel> |
ویژگی های موجود برای amp-carousel
| ویژگی و توضیح | |
|---|---|
| 1 | typeما می توانیم موارد چرخ فلک را به صورت carousel و اسلایدها نمایش دهیم |
| 2 | heightارتفاع carousel بر حسب پیکسل |
| 3 | controls (optional)فلش چپ / راست را بر روی صفحه نمایش می دهد. بعد از چند ثانیه در دستگاه ناپدید می شود. می توان از Css استفاده کرد تا پیکانها را به طور مداوم قابل مشاهده کند. |
| 4 | data-next-button-aria-label (optional)برای تنظیم لیبل carousel بعدی استفاده می شود. |
| 5 | data-prev-button-aria-label (optional)برای تنظیم لیبل carousel قبلی استفاده می شود. |
| 6 | برای نشان دادن اسلاید بعدی بعد از 5000 میلی ثانیه استفاده کنید. IT می تواند با استفاده از مشخصه تأخیر بدون هیچ یک میلی ثانیه در amp-carousel رونویسی شود. این ویژگی حلقه را به چرخ فلک اضافه می کند و اسلایدها پس از پایان یافتن دوباره پخش می شوند. فقط برای type = slides استفاده می شود و برای کارکردن خودکار حداقل به 2 اسلاید نیاز دارید. |
حال، اجازه دهید بر روی نمونه هایی کار کنیم تا چرخ و فلک ها را به روش های مختلف نمایش دهیم.
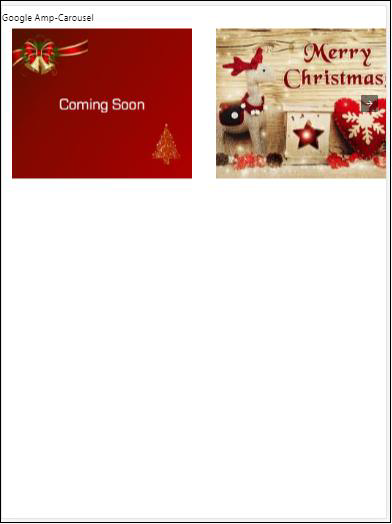
با نوع چرخ فلک ، موارد به صورت افقی قابل پیمایش هستند.
مثال
|
1 2 3 4 5 6 7 8 9 10 11 12 13 14 15 16 17 18 19 20 21 22 23 24 25 26 27 28 29 30 31 32 33 34 35 36 37 38 39 40 41 42 43 44 45 46 47 48 49 50 51 52 53 54 55 56 57 58 59 60 61 62 63 64 65 66 67 68 69 70 71 72 73 74 |
<!doctype html> <html amp lang = "en"> <head> <meta charset = "utf-8"> <title>amp-carousel</title> <script async src = "https://cdn.ampproject.org/v0.js"> </script> <!-- ## Setup --> <!-- Import the carousel component in the header. --> <script async custom-element = "amp-carousel" src = "https://cdn.ampproject.org/v0/amp-carousel-0.1.js"> </script> <link rel = "canonical" href=" https://ampbyexample.com/components/amp-carousel/"> <meta name = "viewport" content = "width = device-width, minimum-scale = 1,initial-scale = 1"> <style amp-boilerplate> body{ -webkit-animation: -amp-start 8s steps(1,end) 0s 1 normal both;-moz-animation: -amp-start 8s steps(1,end) 0s 1 normal both;-ms-animation: -amp-start 8s steps(1,end) 0s 1 normal both;animation: -amp-start 8s steps(1,end) 0s 1 normal both } @-webkit-keyframes -amp-start{from{visibility:hidden}to{visibility:visible}}@-moz-keyframes -amp-start{from{visibility:hidden}to{visibility:visible}}@-ms-keyframes -amp-start{from{visibility:hidden}to{visibility:visible}}@-o-keyframes -amp-start{from{visibility:hidden}to{visibility:visible}}@keyframes -amp-start{from{visibility:hidden}to{visibility:visible}} </style> <noscript> <style amp-boilerplate> body{ -webkit-animation:none; -moz-animation:none; -ms-animation:none; animation:none } </style> </noscript> <style amp-custom> h3{ font-family: "Segoe UI",Arial,sans-serif; font-weight: 400; margin: 10px 0; } </style> </head> <body> <h3>Google Amp-Carousel</h3> <amp-carousel height = "300" layout = "fixed-height" type = "carousel"> <amp-img src = "images/christmas1.jpg" width = "400" height = "300" alt = "a sample image"> </amp-img> <amp-img src = "images/christmas2.jpg" width = "400" height = "300" alt = "another sample image"> </amp-img> <amp-img src = "images/christmas3.jpg" width = "400" height = "300" alt = "and another sample image"> </amp-img> </amp-carousel> </body> </html> |
خروجی
Amp Carousel به عنوان slides
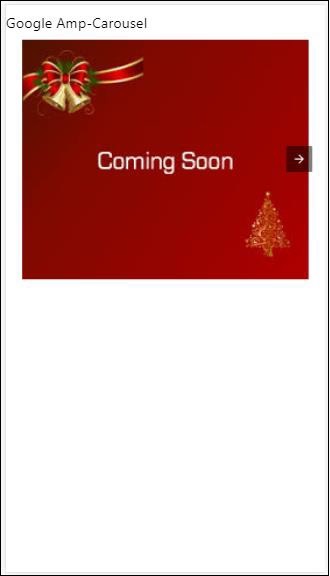
نوع “type = ”slides همزمان یک مورد را نشان می دهد. شما می توانید از طرح به صورت پر ، ثابت ، ارتفاع ثابت ، فلکس ، نمایش گره و پاسخگو استفاده کنید.
مثال
|
1 2 3 4 5 6 7 8 9 10 11 12 13 14 15 16 17 18 19 20 21 22 23 24 25 26 27 28 29 30 31 32 33 34 35 36 37 38 39 40 41 42 43 44 45 46 47 48 49 50 51 52 53 54 55 56 57 58 59 60 61 62 63 64 65 66 67 68 69 70 71 72 73 74 75 76 77 78 79 |
<!doctype html> <html amp lang = "en"> <head> <meta charset = "utf-8"> <title>amp-carousel</title> <script async src = "https://cdn.ampproject.org/v0.js"> </script> <!-- ## Setup --> <!-- Import the carousel component in the header. --> <script async custom-element = "amp-carousel" src = "https://cdn.ampproject.org/v0/amp-carousel-0.1.js"> </script> <link rel = "canonical" href= "https://ampbyexample.com/components/amp-carousel/"> <meta name = "viewport" content = "width = device-width, minimum-scale = 1,initial-scale = 1"> <style amp-boilerplate> body{ -webkit-animation: -amp-start 8s steps(1,end) 0s 1 normal both;-moz-animation: -amp-start 8s steps(1,end) 0s 1 normal both;-ms-animation: -amp-start 8s steps(1,end) 0s 1 normal both;animation: -amp-start 8s steps(1,end) 0s 1 normal both } @-webkit-keyframes -amp-start{from{visibility:hidden}to{visibility:visible}}@-moz-keyframes -amp-start{from{visibility:hidden}to{visibility:visible}}@-ms-keyframes -amp-start{from{visibility:hidden}to{visibility:visible}}@-o-keyframes -amp-start{from{visibility:hidden}to{visibility:visible}}@keyframes -amp-start{from{visibility:hidden}to{visibility:visible}} </style> <noscript> <style amp-boilerplate> body{ -webkit-animation:none; -moz-animation:none; -ms-animation:none; animation:none} </style> </noscript> <style amp-custom> h3{ font-family: "Segoe UI",Arial,sans-serif; font-weight: 400;margin: 10px 0;} </style> </head> <body> <h3>Google Amp-Carousel</h3> <amp-carousel width = "400" height = "300" layout = "responsive" type = "slides"> <amp-img src = "images/christmas1.jpg" width = "400" height = "300" layout = "responsive" alt = "a sample image"> </amp-img> <amp-img src = "images/christmas2.jpg" width = "400" height = "300" layout = "responsive" alt="another sample image"> </amp-img> <amp-img src = "images/christmas3.jpg" width = "400" height = "300" layout = "responsive" alt = "and another sample image"> </amp-img> </amp-carousel> </body> </html> |
خروجی
Amp carousel با استفاده از autoplay
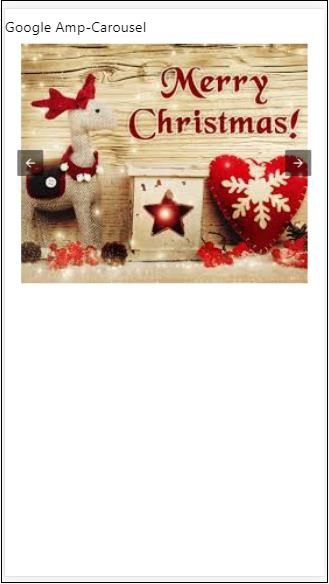
در مثالی که در زیر آورده شده است ، ویژگی autoplay را با تأخیر 2000 میلی ثانیه (2 ثانیه) اضافه کرده ایم. این اسلایدها را بعد از 2 ثانیه تأخیر تغییر می دهد. به طور پیش فرض ، این تاخیر 5000 میلی ثانیه (5 ثانیه) است.
مثال
|
1 2 3 4 5 6 7 8 9 10 11 12 13 14 15 16 17 18 19 20 21 22 23 24 25 26 27 28 29 30 31 32 33 34 35 36 37 38 39 40 41 42 43 44 45 46 47 48 49 50 51 52 53 54 55 56 57 58 59 60 61 62 63 64 65 66 67 68 69 70 71 72 73 74 75 76 77 78 79 80 81 82 |
<!doctype html> <html amp lang = "en"> <head> <meta charset = "utf-8"> <title>amp-carousel</title> <script async src = "https://cdn.ampproject.org/v0.js"> </script> <!-- ## Setup --> <!-- Import the carousel component in the header. --> <script async custom-element = "amp-carousel" src = "https://cdn.ampproject.org/v0/amp-carousel-0.1.js"> </script> <link rel = "canonical" href = "https://ampbyexample.com/components/amp-carousel/"> <meta name = "viewport" content = "width = device-width, minimum-scale = 1,initial-scale = 1"> <style amp-boilerplate> body{ -webkit-animation: -amp-start 8s steps(1,end) 0s 1 normal both;-moz-animation: -amp-start 8s steps(1,end) 0s 1 normal both;-ms-animation: -amp-start 8s steps(1,end) 0s 1 normal both;animation: -amp-start 8s steps(1,end) 0s 1 normal both } @-webkit-keyframes -amp-start{from{visibility:hidden}to{visibility:visible}}@-moz-keyframes -amp-start{from{visibility:hidden}to{visibility:visible}}@-ms-keyframes -amp-start{from{visibility:hidden}to{visibility:visible}}@-o-keyframes -amp-start{from{visibility:hidden}to{visibility:visible}}@keyframes -amp-start{from{visibility:hidden}to{visibility:visible}} </style> <noscript> <style amp-boilerplate> body{ -webkit-animation:none; -moz-animation:none; -ms-animation:none; animation:none} </style> </noscript> <style amp-custom> h3{ font-family: "Segoe UI",Arial,sans-serif; font-weight: 400; margin: 10px 0; } </style> </head> <body> <h3>Google Amp-Carousel</h3> <amp-carousel width = "400" height = "300" layout = "responsive" type = "slides" autoplay delay = "2000"> <amp-img src = "images/christmas1.jpg" width = "400" height = "300" layout = "responsive" alt = "a sample image"> </amp-img> <amp-img src = "images/christmas2.jpg" width = "400" height = "300" layout = "responsive" alt = "another sample image"> </amp-img> <amp-img src = "images/christmas3.jpg" width = "400" height = "300" layout = "responsive" alt = "and another sample image"> </amp-img> </amp-carousel> </body> </html> |
خروجی
AMP Lightbox
Amp-lightbox یک جز amp است که نمای کامل را اشغال می کند و مانند یک روکش نمایش داده می شود.
برای کار با amp-lightbox ، اسکریپت زیر را اضافه کنید –
|
1 2 |
<script async custom-element = "amp-lightbox" src = "https://cdn.ampproject.org/v0/amp-lightbox-0.1.js"> </script> |
ویژگی های موجود برای amp-lightbox
لیست ویژگی های amp-lightbox در زیر آورده شده است –
| ویژگی و توضیح | |
|---|---|
| 1 | animate-in (optional)در اینجا می توانید سبک انیمیشن را برای باز کردن سبد انتخاب کنید. به طور پیش فرض اینگونه است
fade-in مقادیر پشتیبانی شده برای محو شدن، پرواز در پایین و پرواز در بالا است |
| 2 | close-button (required on AMPHTML ads)هنگامی که برای amphtmlads استفاده می شود می توانیم دکمه بستن را برای سبد انتخاب کنیم. |
| 3 | id (required)شناسه منحصر به فرد برای lightbox |
| 4 | layout (required)مقدار طرح نود نمایش خواهد بود |
| 5 | Scrollable (optional)با استفاده از این ویژگی در amp-lightbox می توان محتوای سبد را پیمایش کرد و ارتفاع سبد سبد را سرریز کرد. |
نمونه ای از Lightbox
|
1 2 3 4 5 6 7 8 9 10 11 12 13 14 15 16 17 18 19 20 21 22 23 24 25 26 27 28 29 30 31 32 33 34 35 36 37 38 39 40 41 42 43 44 45 46 47 48 49 50 51 52 53 54 55 56 57 58 59 60 61 62 63 64 65 66 67 68 69 70 71 72 73 74 75 76 77 78 79 80 81 |
<!doctype html> <html amp lang = "en"> <head> <meta charset = "utf-8"> <script async src = "https://cdn.ampproject.org/v0.js"> </script> <title>Google AMP - Amp Lightbox</title> <link rel = "canonical" href = "http://example.ampproject.org/article-metadata.html"> <meta name = "viewport" content = "width = device-width, minimum-scale = 1,initial-scale = 1"> <style amp-boilerplate> body{ -webkit-animation: -amp-start 8s steps(1,end) 0s 1 normal both;-moz-animation: -amp-start 8s steps(1,end) 0s 1 normal both;-ms-animation: -amp-start 8s steps(1,end) 0s 1 normal both;animation: -amp-start 8s steps(1,end) 0s 1 normal both } @-webkit-keyframes -amp-start{from{visibility:hidden}to{visibility:visible}}@-moz-keyframes -amp-start{from{visibility:hidden}to{visibility:visible}}@-ms-keyframes -amp-start{from{visibility:hidden}to{visibility:visible}}@-o-keyframes -amp-start{from{visibility:hidden}to{visibility:visible}}@keyframes -amp-start{from{visibility:hidden}to{visibility:visible}} </style> <noscript> <style amp-boilerplate> body{ -webkit-animation:none; -moz-animation:none; -ms-animation:none; animation:none} </style> </noscript> <script async custom-element = "amp-lightbox" src = "https://cdn.ampproject.org/v0/amp-lightbox-0.1.js"> </script> <style amp-custom> amp-img { border: 1px solid #ddd; border-radius: 4px; padding: 5px; } button{ background-color: #ACAD5C; color: white; padding: 12px 20px; border: none; border-radius: 4px; cursor: pointer; float: left; } .lightbox { background: rgba(211,211,211,0.8); width: 100%; height: 100%; position: absolute; display: flex; align-items: center; justify-content: center; } </style> </head> <body> <h3>Google AMP - Amp Lightbox</h3> <button on = "tap:my-lightbox"> Show LightBox </button> <amp-lightbox id = "my-lightbox" layout = "nodisplay"> <div class = "lightbox" on="tap:my-lightbox.close" tabindex = "0"> <amp-img alt = "Beautiful Flower" src = "images/flower.jpg" width = "246" height = "205"> </amp-img> </div> </amp-lightbox> </body> </html> |
خروجی
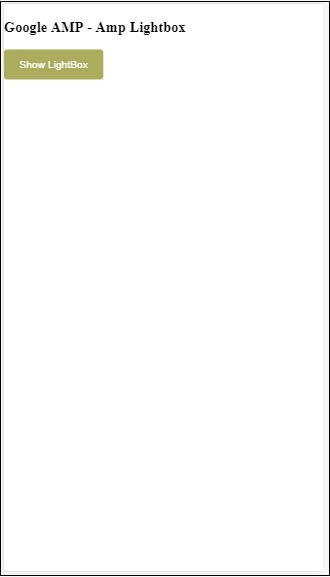
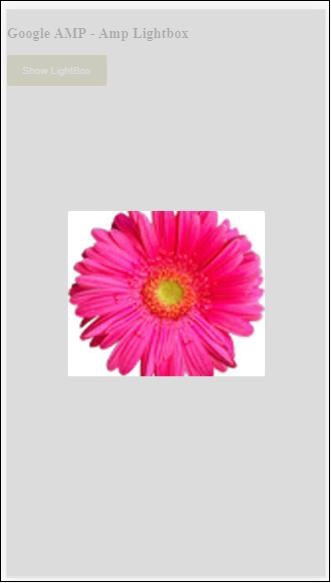
برای بستن lightbox، روی هر قسمت از صفحه کلیک کنید.
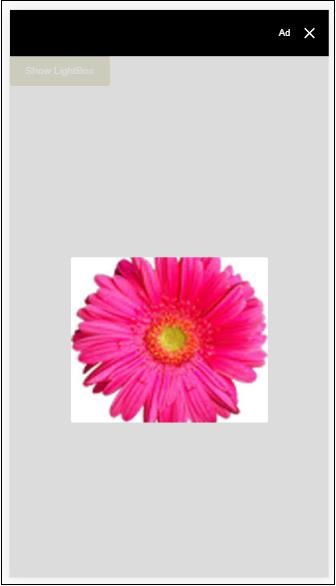
می توانید دکمه بستن را به lightbox اضافه کنید که بیشتر در هنگام نمایش تبلیغات از نوع پوشش استفاده می شود. مثال زیر را مشاهده کنید –
مثال
|
1 2 3 4 5 6 7 8 9 10 11 12 13 14 15 16 17 18 19 20 21 22 23 24 25 26 27 28 29 30 31 32 33 34 35 36 37 38 39 40 41 42 43 44 45 46 47 48 49 50 51 52 53 54 55 56 57 58 59 60 61 62 63 64 65 66 67 68 69 70 71 72 73 74 75 76 77 78 79 80 81 82 |
<!doctype html> <html amp lang = "en"> <head> <meta charset = "utf-8"> <script async src = "https://cdn.ampproject.org/v0.js"> </script> <title>Google AMP - Amp Lightbox</title> <link rel = "canonical" href = "http://example.ampproject.org/article-metadata.html"> <meta name = "viewport" content = "width = device-width, minimum-scale = 1,initial-scale = 1"> <style amp-boilerplate> body{ -webkit-animation: -amp-start 8s steps(1,end) 0s 1 normal both;-moz-animation: -amp-start 8s steps(1,end) 0s 1 normal both;-ms-animation: -amp-start 8s steps(1,end) 0s 1 normal both;animation: -amp-start 8s steps(1,end) 0s 1 normal both } @-webkit-keyframes -amp-start{from{visibility:hidden}to{visibility:visible}}@-moz-keyframes -amp-start{from{visibility:hidden}to{visibility:visible}}@-ms-keyframes -amp-start{from{visibility:hidden}to{visibility:visible}}@-o-keyframes -amp-start{from{visibility:hidden}to{visibility:visible}}@keyframes -amp-start{from{visibility:hidden}to{visibility:visible}} </style> <noscript> <style amp-boilerplate> body{ -webkit-animation:none; -moz-animation:none; -ms-animation:none; animation:none} </style> </noscript> <script async custom-element = "amp-lightbox" src = "https://cdn.ampproject.org/v0/amp-lightbox-0.1.js"> </script> <style amp-custom> amp-img { border: 1px solid #ddd; border-radius: 4px; padding: 5px; } button{ background-color: #ACAD5C; color: white; padding: 12px 20px; border: none; border-radius: 4px; cursor: pointer; float: left; } .lightbox { background: rgba(211,211,211,0.8); width: 100%; height: 100%; position: absolute; display: flex; align-items: center; justify-content: center; } </style> </head> <body> <h3>Google AMP - Amp Lightbox</h3> <button on = "tap:my-lightbox"> Show LightBox </button> <amp-lightbox id = "my-lightbox" layout = "nodisplay" close-button> <div class = "lightbox" on = "tap:my-lightbox.close"> <amp-img alt = "Beautiful Flower" src = "images/flower.jpg" width = "246" height = "205"> </amp-img> </div> </amp-lightbox> </body> </html> |
خروجی
amp-sidebar
amp-sidebar جز amp است که برای نمایش محتوایی که از کنار پنجره با ضربه زدن روی یک دکمه می لغزد ، استفاده می شود.
برای کار با amp-sidebar باید اسکریپت زیر را اضافه کنیم –
|
1 2 3 |
<script async custom-element = "amp-sidebar" src = " https://cdn.ampproject.org/v0/amp-sidebar-0.1.js "> </script> |
تگ amp-sidebar
|
1 2 3 4 |
<amp-sidebar id = "sidebar" layout = "nodisplay" side = "right"> <span on = "tap:sidebar.close">X</span> Html content here.. </amp-sidebar> |
لیست ویژگی های موجود در amp-sidebar در زیر آورده شده است –
| ویژگی و توضیح | |
|---|---|
| 1 | sideاین ویژگی نوار کناری را در جهت مشخص شده باز می کند. مثال چپ / راست |
| 2 | layoutNodisplay برای طرح نوار کناری استفاده خواهد شد |
| 3 | openاین ویژگی با باز شدن نوار کناری اضافه می شود. |
| 4 | data-close-button-aria-labelبرای تنظیم لیبل برای دکمه بستن استفاده می شود. |
ما با استفاده از ویژگی های فوق با نوار کناری کار خواهیم کرد. مثالی که در زیر نشان داده شده را مشاهده کنید –
مثال
|
1 2 3 4 5 6 7 8 9 10 11 12 13 14 15 16 17 18 19 20 21 22 23 24 25 26 27 28 29 30 31 32 33 34 35 36 37 38 39 40 41 42 43 44 45 46 47 48 49 50 51 52 53 54 55 56 57 58 59 60 61 62 63 64 65 66 67 68 69 70 71 |
<!doctype html> <html amp lang = "en"> <head> <meta charset = "utf-8"> <script async src = "https://cdn.ampproject.org/v0.js"> </script> <title>Google AMP - Amp Sidebar</title> <link rel = "canonical" href=" http://example.ampproject.org/article-metadata.html"> <meta name = "viewport" content = "width = device-width, minimum-scale = 1,initial-scale = 1"> <style amp-boilerplate> body{ -webkit-animation: -amp-start 8s steps(1,end) 0s 1 normal both;-moz-animation: -amp-start 8s steps(1,end) 0s 1 normal both;-ms-animation: -amp-start 8s steps(1,end) 0s 1 normal both;animation: -amp-start 8s steps(1,end) 0s 1 normal both } @-webkit-keyframes -amp-start{from{visibility:hidden}to{visibility:visible}}@-moz-keyframes -amp-start{from{visibility:hidden}to{visibility:visible}}@-ms-keyframes -amp-start{from{visibility:hidden}to{visibility:visible}}@-o-keyframes -amp-start{from{visibility:hidden}to{visibility:visible}}@keyframes -amp-start{from{visibility:hidden}to{visibility:visible}} </style> <noscript> <style amp-boilerplate> body{ -webkit-animation:none; -moz-animation:none; -ms-animation:none; animation:none} </style> </noscript> <script async custom-element = "amp-sidebar" src = "https://cdn.ampproject.org/v0/amp-sidebar-0.1.js"> </script> <style amp-custom> amp-img { border: 1px solid #ddd; border-radius: 4px; padding: 5px; } button{ background-color: #ACAD5C; color: white; padding: 12px 20px; border: none; border-radius: 4px; cursor: pointer; float: left; } </style> </head> <body> <h3>Google AMP - Amp Sidebar</h3> <button on = "tap:sidebar"> Show Sidebar </button> <amp-sidebar id = "sidebar" layout = "nodisplay" side = "right"> <span on = "tap:sidebar.close">X</span> <ul> <li><a href = "/">About</a></li> <li><a href = "/">Services</a></li> <li><a href = "/">Contact US</a></li> </ul> </amp-sidebar> </body> </html> |
خروجی
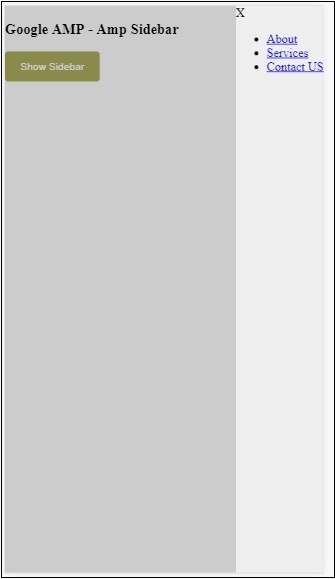
ما از ویژگی side برای باز کردن نوار کناری در سمت راست استفاده کرده ایم. برای باز کردن آن در سمت چپ می توانید از ویژگی left to side استفاده کنید. ویژگی layout باید nodisplay باشد. هنگام باز شدن نوار کناری ، ویژگی open وجود دارد.
data-close-button-aria-label
ویژگی برای افزودن دکمه بستن استفاده می شود. این یک اختیاری است و استفاده از آن اجباری نیست.
Amp Image Slider
Amp-image-slider یک جز amp است که برای مقایسه دو تصویر با اضافه کردن اسلایدر در حرکت عمودی آن بر روی تصویر استفاده می شود.
برای کار با amp-img-slider اسکریپت زیر را اضافه کنید –
|
1 2 3 |
<script async custom-element = "amp-image-slider" src = " https://cdn.ampproject.org/v0/amp-image-slider-0.1.js"> </script> |
تگ amp-img-slider
|
1 2 3 4 5 6 |
<amp-image-slider width = "300" height = "200" layout = "responsive"> <amp-img src = "images/christmas1.jpg" layout = "fill"> </amp-img> <amp-img src = "images/christmas2.jpg" layout = "fill"> </amp-img> </amp-image-slider> |
نمونه ای از amp-img-slider در اینجا نشان داده شده است. در اینجا ما 2 تصویر در داخل amp-img-slider اضافه کرده ایم ، جایی که اولین تصویر مانند یک نوار لغزنده عمل می کند و می توانید در بالای تصویر دوم اسلاید کنید.
مثال
|
1 2 3 4 5 6 7 8 9 10 11 12 13 14 15 16 17 18 19 20 21 22 23 24 25 26 27 28 29 30 31 32 33 34 35 36 37 38 39 40 41 42 43 44 45 46 47 48 49 50 51 52 53 54 55 56 57 58 59 60 61 62 63 64 |
<!doctype html> <html amp lang = "en"> <head> <meta charset = "utf-8"> <script async src = "https://cdn.ampproject.org/v0.js"> </script> <title>Google AMP - Amp Image Slider</title> <link rel = "canonical" href = "http://example.ampproject.org/article-metadata.html"> <meta name = "viewport" content = "width = device-width, minimum-scale = 1,initial-scale = 1"> <style amp-boilerplate> body{ -webkit-animation: -amp-start 8s steps(1,end) 0s 1 normal both;-moz-animation: -amp-start 8s steps(1,end) 0s 1 normal both;-ms-animation: -amp-start 8s steps(1,end) 0s 1 normal both;animation: -amp-start 8s steps(1,end) 0s 1 normal both } @-webkit-keyframes -amp-start{from{visibility:hidden}to{visibility:visible}}@-moz-keyframes -amp-start{from{visibility:hidden}to{visibility:visible}}@-ms-keyframes -amp-start{from{visibility:hidden}to{visibility:visible}}@-o-keyframes -amp-start{from{visibility:hidden}to{visibility:visible}}@keyframes -amp-start{from{visibility:hidden}to{visibility:visible}} </style> <noscript> <style amp-boilerplate> body{ -webkit-animation:none; -moz-animation:none; -ms-animation:none; animation:none} </style> </noscript> <script async custom-element = "amp-image-slider" src = "https://cdn.ampproject.org/v0/amp-image-slider-0.1.js"> </script> <style amp-custom> amp-img { border: 1px solid #ddd; border-radius: 4px; padding: 5px; } </style> </head> <body> <h3>Google AMP - Amp Image Slider</h3> <amp-image-slider width = "300" height = "200" layout = "responsive"> <amp-img src = "images/christmas1.jpg" layout = "fill"> </amp-img> <amp-img src = "images/christmas2.jpg" layout = "fill"> </amp-img> </amp-image-slider> </body> </html> |
خروجی
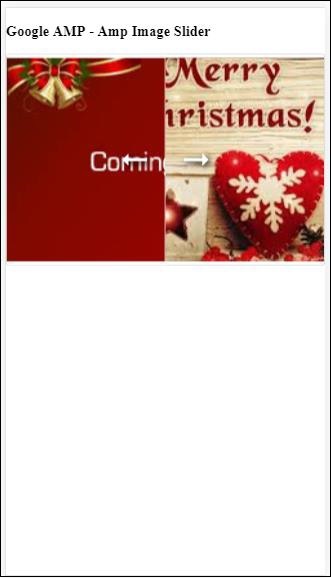
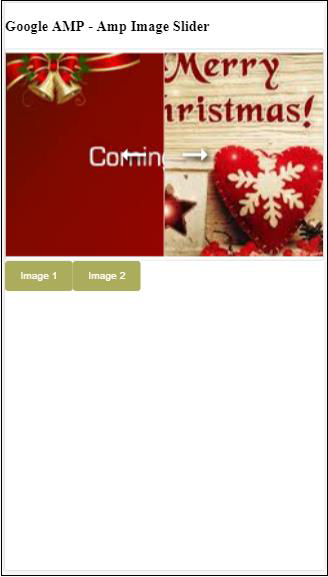
نوار لغزنده Amp-image دارای عملیاتی است به نام seekTo برای استفاده از آن می توانید تصویر را تغییر دهید همانطور که در مثال زیر نشان داده شده است –
مثال
|
1 2 3 4 5 6 7 8 9 10 11 12 13 14 15 16 17 18 19 20 21 22 23 24 25 26 27 28 29 30 31 32 33 34 35 36 37 38 39 40 41 42 43 44 45 46 47 48 49 50 51 52 53 54 55 56 57 58 59 60 61 62 63 64 65 66 67 68 69 70 71 72 73 74 75 76 77 78 79 |
<!doctype html> <html amp lang = "en"> <head> <meta charset = "utf-8"> <script async src = "https://cdn.ampproject.org/v0.js"> </script> <title>Google AMP - Amp Image Slider</title> <link rel = "canonical" href =" http://example.ampproject.org/article-metadata.html"> <meta name = "viewport" content = "width = device-width, minimum-scale = 1,initial-scale = 1"> <style amp-boilerplate> body{ -webkit-animation: -amp-start 8s steps(1,end) 0s 1 normal both;-moz-animation: -amp-start 8s steps(1,end) 0s 1 normal both;-ms-animation: -amp-start 8s steps(1,end) 0s 1 normal both;animation: -amp-start 8s steps(1,end) 0s 1 normal both } @-webkit-keyframes -amp-start{from{visibility:hidden}to{visibility:visible}}@-moz-keyframes -amp-start{from{visibility:hidden}to{visibility:visible}}@-ms-keyframes -amp-start{from{visibility:hidden}to{visibility:visible}}@-o-keyframes -amp-start{from{visibility:hidden}to{visibility:visible}}@keyframes -amp-start{from{visibility:hidden}to{visibility:visible}} </style> <noscript> <style amp-boilerplate> body{ -webkit-animation:none; -moz-animation:none; -ms-animation:none; animation:none} </style> </noscript> <script async custom-element = "amp-image-slider" src = "https://cdn.ampproject.org/v0/amp-image-slider-0.1.js"> </script> <style amp-custom> amp-img { border: 1px solid #ddd; border-radius: 4px; padding: 5px; } button{ background-color: #ACAD5C; color: white; padding: 12px 20px; border: none; border-radius: 4px; cursor: pointer; float: left; } .amp-sidebar-toolbar-target-shown { display: none; } </style> </head> <body> <h3>Google AMP - Amp Image Slider</h3> <amp-image-slider width = "300" id="slider1" height = "200" layout = "responsive"> <amp-img src = "images/christmas1.jpg" layout = "fill"> </amp-img> <amp-img src = "images/christmas2.jpg" layout = "fill"> </amp-img> </amp-image-slider> <button on = "tap:slider1.seekTo(percent = 1)"> Image 1 </button> <button on = "tap:slider1.seekTo(percent = 0)"> Image 2 </button> </body> </html> |
خروجی
لیست جلسات قبل آموزش گوگل AMP
- آموزش گوگل AMP
- بررسی اجمالی گوگل AMP
- مقدمه گوگل AMP
- آموزش تصاویر در گوگل AMP
- آموزش فرم در گوگل AMP
- آموزش Iframes در گوگل AMP
- آموزش ویدیو در گوگل AMP
- آموزش دکمه در گوگل AMP
- آموزش Timeago در گوگل AMP
- آموزش Mathml در گوگل AMP
- آموزش تگ Fit Text در گوگل AMP
- آموزش شمارش معکوس تاریخ در گوگل AMP
- آموزش انتخاب کننده تاریخ در گوگل AMP
- آموزش استوری در گوگل AMP
- آموزش انتخاب کننده در گوگل AMP
- آموزش لینک در گوگل AMP
- آموزش فونت در گوگل AMP
- آموزش لیست در گوگل AMP
- آموزش اعلان کاربر در گوگل AMP
- آموزش next page در گوگل AMP
- آموزش ویژگی ها در گوگل AMP
- آموزش استایل ها و CSS سفارشی در گوگل AMP
- آموزش کلاس های CSS پویا در گوگل AMP
- آموزش اکشن ها و رویدادها در گوگل AMP
- آموزش انیمیشن در گوگل AMP
- آموزش اتصال داده در گوگل AMP
- آموزش طرح بندی در گوگل AMP
- آموزش تبلیغات در گوگل AMP
- آموزش تجزیه و تحلیل در گوگل AMP
- آموزش ویجت های اجتماعی در گوگل AMP
- آموزش نحو در گوگل AMP
- آموزش اعتبار سنجی در گوگل AMP
- آموزش اجزا جاوا اسکریپت در گوگل AMP




.svg)
دیدگاه شما