آموزش انتخاب کننده در گوگل AMP

آموزش انتخاب کننده در گوگل AMP
در این درس از مجموعه آموزش برنامه نویسی سایت سورس باران، به آموزش انتخاب کننده در گوگل AMP خواهیم پرداخت.
Amp-selector یک جز amp است که منوی گزینه ها را نمایش می دهد و کاربر می تواند از بین گزینه ها انتخاب کند. گزینه های نمایش داده شده می توانند متن، تصاویر یا هر جز amp باشند. در این درس، اجازه دهید به طور مفصل در مورد این بحث کنیم.
برای کار با amp-selector، ما باید فایل های javascript زیر را وارد کنیم –
|
1 2 3 |
<script async custom-element = "amp-selector" src = "https://cdn.ampproject.org/v0/amp-selector-0.1.js"> </script> |
فرمت amp-selector
کد زیر نمونه ای را برای فرمت amp-selector نشان می دهد –
|
1 2 3 4 5 6 7 8 9 10 11 12 13 14 15 16 17 18 19 20 21 |
<amp-selector layout = "container"> <amp-img src = "images/christmas1.jpg" width = "60" height = "40" option = "1"> <amp-img src = "images/christmas2.jpg" width = "60" height = "40" option = "2"> </amp-img> <amp-img src = "images/christmas3.jpg" width = "60" height = "40" option = "3"> </amp-img> <amp-img src = "images/christmas4.jpg" width = "60" height = "40" option = "4"> </amp-img> </amp-selector> |
شما می توانید از تگ های استاندارد html یا اجزای آمپ در داخل amp-selector استفاده کنید. محتویات مانند منو در صفحه نمایش داده می شود و کاربر می تواند بین آنها را انتخاب کند. منوهای نمایش داده شده می توانند یک انتخاب واحد یا چند گزینه ای باشند.
بگذارید این موضوع را با کمک یک مثال از تک انتخاب و چند انتخاب به شرح زیر درک کنیم.
amp-selector تک انتخاب
کد زیر نمونه ای از amp-selector single select است –
|
1 2 3 4 5 6 7 8 9 10 11 12 13 14 15 16 17 18 19 20 21 22 23 24 25 26 27 28 29 30 31 32 33 34 35 36 37 38 39 40 41 42 43 44 45 46 47 48 49 50 51 52 53 54 55 56 57 58 59 60 61 62 63 64 65 66 67 68 |
<!doctype html> <html amp lang = "en"> <head> <meta charset = "utf-8"> <script async src = "https://cdn.ampproject.org/v0.js"></script> <title>Google AMP - Amp Selector</title> <link rel = "canonical" href = "http://example.ampproject.org/article-metadata.html"> <meta name="viewport" content="width=device-width,minimum-scale = 1,initial-scale = 1"> <style amp-boilerplate> body{- webkit-animation:-amp-start 8s steps(1,end) 0s 1 normal both;-moz-animation: -amp-start 8s steps(1,end) 0s 1 normal both;-ms-animation: -amp-start 8s steps(1,end) 0s 1 normal both;animation: -amp-start 8s steps(1,end) 0s 1 normal both } @-webkit-keyframes -amp-start{from{visibility:hidden}to{visibility:visible}}@-moz-keyframes -amp-start{from{visibility:hidden}to{visibility:visible}}@-ms-keyframes -amp-start{from{visibility:hidden}to{visibility:visible}}@-o-keyframes -amp-start{from{visibility:hidden}to{visibility:visible}}@keyframes -amp-start{from{visibility:hidden}to{visibility:visible}} </style> <noscript> <style amp-boilerplate> body{ -webkit-animation:none;-moz-animation:none; -ms-animation:none;animation:none} </style> </noscript> <script async custom-element="amp-selector" src = "https://cdn.ampproject.org/v0/amp-selector-0.1.js"> </script> <style amp-custom> amp-selector:not([disabled]) amp-img[option][selected]:not([disabled]) { outline-color: #b6A848; outline-width: 2px; } </style> </head> <body> <h3>Google AMP - Amp Selector</h3> <amp-selector layout = "container"> <amp-img src = "images/christmas1.jpg" width = "60" height = "40" option="1"> </amp-img> <amp-img src="images/christmas2.jpg" widt h = 60" height = "40" option = "2"> </amp-img> <amp-img src = "images/christmas3.jpg" width = "60" height = "40" option = "3"> </amp-img> <amp-img src = "images/christmas4.jpg" width = "60" height = "40" option = "4"> </amp-img> </amp-selector> </body> </html> |
خروجی
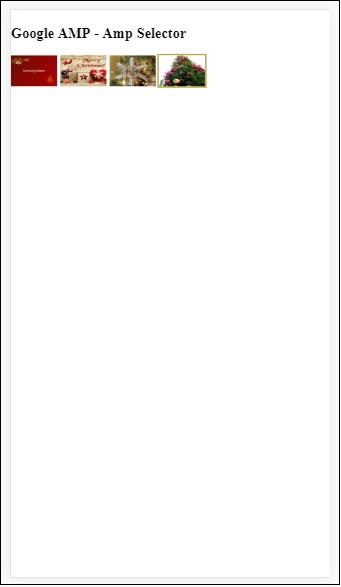
خروجی کد فوق به شرح زیر است:

توجه داشته باشید که در مثال بالا ما از amp-selector استفاده کرده ایم و برای نشان دادن گزینه ها از تصاویر در داخل استفاده کرده ایم. این یک انتخاب تک گزینه است بنابراین می توانید هر تصویر را همانطور که در خروجی نشان داده شده است ، انتخاب کنید.
amp-selector چند گزینه ای
در این مثال ، اجازه دهید amp-selector را با استفاده از چندین ویژگی با تصاویر نمایش دهیم ، می توانیم چندین گزینه را از انتخابگر انتخاب کنیم.
مثال
|
1 2 3 4 5 6 7 8 9 10 11 12 13 14 15 16 17 18 19 20 21 22 23 24 25 26 27 28 29 30 31 32 33 34 35 36 37 38 39 40 41 42 43 44 45 46 47 48 49 50 51 52 53 54 55 56 57 58 59 60 61 62 63 64 65 66 67 68 69 70 |
<!doctype html> <html amp lang = "en"> <head> <meta charset = "utf-8 "> <script async src = "https://cdn.ampproject.org/v0.js"></script> <title>Google AMP - Amp Selector</title> <link rel = "canonical" href = "http://example.ampproject.org/article-metadata.html"> <meta name = "viewport" content = "width = device-width,minimum-scale = 1,initial-scale =1"> <style amp-boilerplate> body{-webkit-animation: -amp-start 8s steps(1,end) 0s 1 normal both;-moz-animation: -amp-start 8s steps(1,end) 0s 1 normal both;-ms-animation: -amp-start 8s steps(1,end) 0s 1 normal both;animation: -amp-start 8s steps(1,end) 0s 1 normal both} @-webkit-keyframes -amp-start{from{visibility:hidden}to{visibility:visible}}@-moz-keyframes -amp-start{from{visibility:hidden}to{visibility:visible}}@-ms-keyframes -amp-start{from{visibility:hidden}to{visibility:visible}}@-o-keyframes -amp-start{from{visibility:hidden}to{visibility:visible}}@keyframes -amp-start{from{visibility:hidden}to{visibility:visible}} </style> <noscript> <style amp-boilerplate> body{ -webkit-animation:none;-moz-animation:none; -ms-animation:none;animation:none } </style> </noscript> <script async custom-element = "amp-selector" src = "https://cdn.ampproject.org/v0/amp-selector-0.1.js"> </script> <style amp-custom> amp-selector:not([disabled]) amp-img[option][selected]:not([disabled]) { outline-color: blue; outline-width: 2px; } </style> </head> <body> <h3>Google AMP - Amp Selector</h3> <amp-selector layout = "container" multiple> <amp-img src = "images/christmas1.jpg" width = "60" height ="40" option = "1"> </amp-img> <amp-img src="images/christmas2.jpg" width = "60" height = "40" option = "2"> </amp-img> <amp-img src ="images/christmas3.jpg" width = "60" height = "40" option = "3"> </amp-img> <amp-img src = "images/christmas4.jpg" width = "60" height = "40" option = "4"> </amp-img> </amp-selector> </body> </html> |
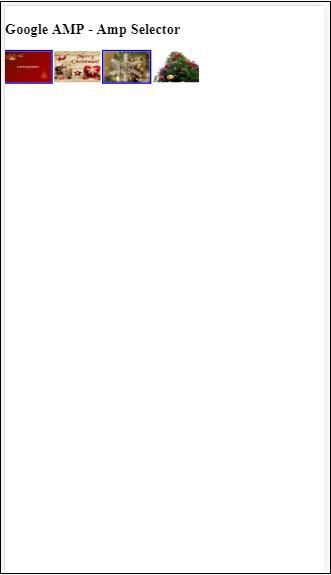
خروجی
خروجی کد نشان داده شده در بالا در زیر آورده شده است –

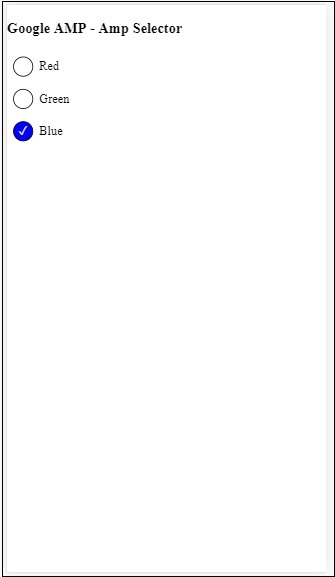
ما همچنین می توانیم از amp-selector برای نشان دادن دکمه های رادیویی استفاده کنیم همانطور که در کد زیر نشان داده شده است –
مثال
|
1 2 3 4 5 6 7 8 9 10 11 12 13 14 15 16 17 18 19 20 21 22 23 24 25 26 27 28 29 30 31 32 33 34 35 36 37 38 39 40 41 42 43 44 45 46 47 48 49 50 51 52 53 54 55 56 57 58 59 60 61 62 63 64 65 66 67 68 69 70 71 72 73 74 75 76 77 78 79 80 81 82 83 84 85 86 87 |
<!doctype html> <html amp lang = "en"> <head> <meta charset = "utf-8"> <script async src = "https://cdn.ampproject.org/v0.js"></script> <title>Google AMP - Amp Selector</title> <link rel = "canonical" href = "http://example.ampproject.org/article-metadata.html"> <meta name = "viewport" content ="width = device-width,minimum-scale = 1,initial-scale = 1"> <style amp-boilerplate> body{ -webkit-animation: -amp-start 8s steps(1,end) 0s 1 normal both;-moz-animation: -amp-start 8s steps(1,end) 0s 1 normal both;-ms-animation: -amp-start 8s steps(1,end) 0s 1 normal both;animation: -amp-start 8s steps(1,end) 0s 1 normal both } @-webkit-keyframes -amp-start{from{visibility:hidden}to{visibility:visible}}@-moz-keyframes -amp-start{from{visibility:hidden}to{visibility:visible}}@-ms-keyframes -amp-start{from{visibility:hidden}to{visibility:visible}}@-o-keyframes -amp-start{from{visibility:hidden}to{visibility:visible}}@keyframes -amp-start{from{visibility:hidden}to{visibility:visible}} </style> <noscript> <style amp-boilerplate> body{ -webkit-animation:none; -moz-animation:none; -ms-animation:none; animation:none} </style> </noscript> <script async custom-element = "amp-selector" src = "https://cdn.ampproject.org/v0/amp-selector-0.1.js"> </script> <style amp-custom> .radio-menu { list-style: none; } .radio-menu [option][selected] { outline: none; } .radio-menu [option] { display: flex; align-items: center; } .radio-menu [option]:before { transition: background 0.25s ease-in-out; content: ""; display: inline-block; width: 24px; height: 24px; margin: 8px; border-radius: 100%; border: solid 1px black; } .radio-menu [option = red][selected]:before { text-align: center; content: "✓"; color: white; background: red; } .radio-menu [option = green][selected]:before { text-align: center; content: "✓"; color: white; background: green; } .radio-menu [option = blue][selected]:before { text-align: center; content: "✓"; color: white; background: blue; } </style> </head> <body> <h3>Google AMP - Amp Selector</h3> <amp-selector class = "radio-menu" layout = "container" name = "my-selector"> <div option = "red">Red</div> <div option = "green">Green</div> <div option = "blue">Blue</div> </amp-selector> </body> </html> |
خروجی

منبع.
لیست جلسات قبل آموزش گوگل AMP
- آموزش گوگل AMP
- بررسی اجمالی گوگل AMP
- مقدمه گوگل AMP
- آموزش تصاویر در گوگل AMP
- آموزش فرم در گوگل AMP
- آموزش Iframes در گوگل AMP
- آموزش ویدیو در گوگل AMP
- آموزش دکمه در گوگل AMP
- آموزش Timeago در گوگل AMP
- آموزش Mathml در گوگل AMP
- آموزش تگ Fit Text در گوگل AMP
- آموزش شمارش معکوس تاریخ در گوگل AMP
- آموزش انتخاب کننده تاریخ در گوگل AMP
- آموزش استوری در گوگل AMP
- آموزش انتخاب کننده در گوگل AMP
- آموزش لینک در گوگل AMP
- آموزش فونت در گوگل AMP
- آموزش لیست در گوگل AMP
- آموزش اعلان کاربر در گوگل AMP
- آموزش next page در گوگل AMP
- آموزش ویژگی ها در گوگل AMP
- آموزش استایل ها و CSS سفارشی در گوگل AMP
- آموزش کلاس های CSS پویا در گوگل AMP
- آموزش اکشن ها و رویدادها در گوگل AMP
- آموزش انیمیشن در گوگل AMP
- آموزش اتصال داده در گوگل AMP
- آموزش طرح بندی در گوگل AMP
- آموزش تبلیغات در گوگل AMP
- آموزش تجزیه و تحلیل در گوگل AMP
- آموزش ویجت های اجتماعی در گوگل AMP
- آموزش نحو در گوگل AMP
- آموزش اعتبار سنجی در گوگل AMP
- آموزش اجزا جاوا اسکریپت در گوگل AMP


.svg)
دیدگاه شما